Shipping My Rust CLI to Windows: Lessons Learned (feat. Windows 98 and APE Bonus)
Have you ever been curious about shipping Rust software to Windows users? Did you ever want to create a binary that works on Windows 98 through Windows 11? Or one binary that runs on six different systems? No? Well, I did.
In this post, I will discuss:
- Packaging for Scoop, Chocolatey, and Winget
- Multi-platform support with Mise
- Time-traveling to Windows 98 with retro-compatible builds
- Actually Portable Executables that run on any platform
As a reminder, this is a series of posts I made about packaging my Rust CLI:
- Part 1: PyPI, NPM, and GitHub Actions
- Part 2: Linux and macOS
- Part 3: FreeBSD, Nix, Guix
- Part 4: Windows and multi-platform (this post)
One of the reasons why I wrote this post was to share what I learned writing celq. It is a small tool that can query JSON, TOML, and YAML from the command line. Go check it out!
Scoop
Let’s start with Scoop because, in my opinion, it is one of the most flexible distribution channels. Although the implementations are completely different, Scoop shares many positive aspects with Homebrew discussed in part 2.
Scoop has the concept of buckets. Buckets are Git repos that are a collection of apps. To add a bucket, I instruct my users to run:
scoop bucket add get-celq https://github.com/get-celq/scoop-bucketInside the Git repository, there are app manifests in the
buckets/ folder. The manifests are in JSON format. To
install my CLI, users need to run:
scoop install get-celq/celqThere is a main bucket that ships by default with Scoop,
so running things like scoop install main/uv works with
less friction. Naturally, the bar for submitting apps to the main bucket
is higher. For me, a third-party bucket controlled by myself was
sufficient.
Having established what buckets are, let’s investigate the manifest. You can take a look at an example such as celq.json. Scoop manifests will generally point to GitHub releases.
Keeping a Scoop bucket up-to-date looks like this:
- Download the Windows binary from GitHub releases
- Calculate the SHA256 checksum for the release
- Fill in the template of the JSON manifest with the hash and the version
- Make a commit with the updated version
A fun fact about celq is the dogfooding: I generate celq’s manifest with celq. Take a look at celq.json.cel if you are curious.
Mise
Moving on to Mise. This is a multi-platform solution that perhaps should have been covered in part 1. It wasn’t, so now is the second-best moment.
Mise is a polyglot tool manager. It has the concept of mise.toml, which makes it easy to share the environment. It also has the concept of backends: Mise can fetch tools from multiple ecosystems.
For most Rust projects, I believe that the cargo and
github backends would be freebies. If you publish to
crates.io or to GitHub releases, that should get you covered for
commands like mise use -g cargo:celq.
Mise can be interesting when you have Windows developers because it would allow a shared configuration across operating systems. I do not know how well that fares in practice, but conceptually that can avoid duplicating work (e.g., setting up a separate script for configuring a Windows environment).
Chocolatey
Next, we are back to a Windows-specific package manager: Chocolatey. Among the three package managers for Windows that we discuss today, Chocolatey is the oldest. It also comes pre-installed on all Windows GitHub runners, which can be handy.
Chocolatey is built on top of NuGet. Generally, it will have the following format:
awesomepackage/
├── awesomepackage.nuspec
└── tools/
    ├── awesomepackage.exe
    ├── LICENSE.txt
    ├── VERIFICATION.txt
    └── chocolateyInstall.ps1
The .nuspec file is an XML manifest. You can take a look
at celq.nuspec
to see roughly what it looks like. Perhaps the most important section of
the manifest is where <files> is defined, in our case
pointing to tools.
For celq, I bundled the binary with the file I uploaded to
Chocolatey. It is possible to include scripts for pre-install and
post-install steps like chocolateyInstall. The scripts can
range from downloading the binary from GitHub releases to creating
default configuration files and folders. Because my CLI was simple, I
didn’t include a script and simply shipped celq.exe.
Lastly, about VERIFICATION.txt: Chocolatey has a manual
verification process! I was not aware of that when I first uploaded my
package, but everything gets reviewed by a human. Due to that, it’s not
uncommon for Chocolatey packages to lag a bit behind other repositories.
But at least there is more oversight compared with, say, NPM.
The file includes instructions for the Chocolatey admins to verify your upload. I got it wrong the first time, so here is my suggestion based on what got accepted without pushback:
VERIFICATION.txt that gets accepted
VERIFICATION

This package is built from source and published by the maintainers.

Generated by `CertUtil -hashfile awesomepackage.exe SHA256`:

SHA256_EXE

---

To verify the binary, confirm that awesomepackage.exe's SHA256 matches
the SHA256 reported at the attestation URL:
https://github.com/user/awesomepackage/attestations/FILL_ME


Alternatively, this can be done via the command line:

0. If you do not have the GitHub CLI installed:
   choco install gh

1. Authenticate the GitHub CLI, if you haven't done so:
   gh auth login

2. Verify the attestation of awesomepackage.exe:

   gh attestation verify awesomepackage.exe --repo user/awesomepackage
A summary of my tip is:
- Package the same
.exefrom GitHub Releases for Windows. Do not runcargo buildmultiple times, as builds are not guaranteed to be deterministic (i.e., the checksum can change). - Include the SHA256 of the
.exe - Generate a GitHub Attestation that we discussed in part 2
Deterministic builds are possible, but that is out-of-scope for this post.
WinGet
WinGet is Windows Package Manager, backed by Microsoft itself. It is newer than Chocolatey, but has seen increasing adoption. It comes pre-installed on consumer editions of Windows 11. Windows Server is not guaranteed to have it, but the GitHub Actions runners do, too.
WinGet uses YAML manifests and has the default source set to winget-pkgs, a GitHub repository maintained by Microsoft. It is possible to add other sources, and some solutions like winget.pro offer ready-made private setups, but I will not discuss those.
I recommend using one of the following two tools to generate the manifests:
I originally used winget-create because it was made by Microsoft, but komac might be more convenient as you can run it on Linux, which can be handy for CI/CD and folks that cross-compile.
When running winget-create/komac, the tools will ask you questions to
help fill the metadata of the manifest. The most important one is the
Installer URL question. You can make it point to GitHub
Releases. Once it has the GitHub URL, it even generates the SHA256
checksum for you in the YAML file.
Updating WinGet packages consists of creating an automation to open pull requests to Microsoft’s repository. winget-releaser seems to be a popular option. Similarly to Chocolatey, WinGet packages can lag behind slightly because the PRs need to be reviewed by a human.
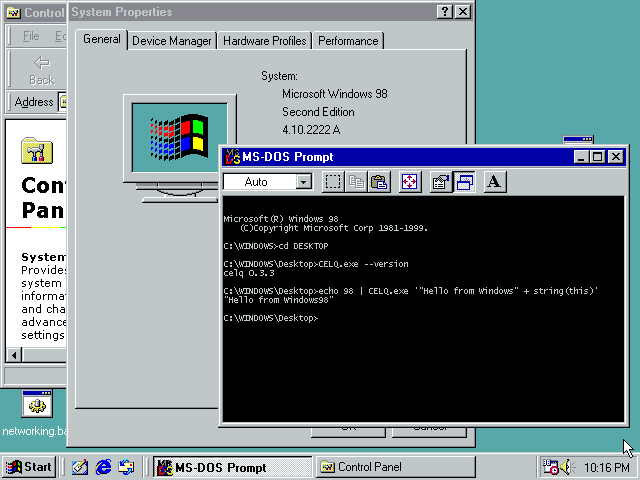
Windows 98 and Retro Computing
Moving to the most fun but least practical part of the blog post: Windows 98. I am happy to share that I have managed to run celq on an operating system that is 25+ years old.
This is anachronistic. Even though JavaScript was around in 1998, JSON was not formalized until the early 2000s, so the usefulness of a JSON query tool is dubious. The binary size of 5 MB would be considered bloated for the time. Rust only ever supported Windows XP, and that support was removed in 2021. Despite all of that, it was still tempting to see how far back I could go.
To support old versions of Windows, I chose the WASM route. I already had implemented an interactive playground for celq, so this was a natural next step. There are other ways of tackling this problem that I will not discuss (e.g., Rust9X, KernelEx, no_std).
From WASM to C to Windows 98
My initial strategy was to use w2c2. w2c2 is a neat tool
written by Bastian Müller
that transpiles WASM to C89. w2c2 also supports WASI, so I could compile
my binary with the wasm32-wasip1
target and go from there.
w2c2 is handy in this context because it splits the problem in two
parts. The first one is compiling to WASM: if your Rust code can be
compiled to WASM, you are 50% of your way there. There can be some
friction in this part, as some of your code or dependencies might not
support WASM. For example, the allocator I used (mimalloc)
didn’t, and I had to disable it for the WASM build. But overall, Rust
still has excellent WASM support.
The second part is finding a C compiler supporting C89. And this is where the w2c2 author intentionally gifted the retro-computing community. C89 is such an old standard that it acts as a common denominator for many systems. There are C89 compilers for IBM’s OS/2, Apple’s Classic Mac OS, Windows 3.1, early versions of Sun’s Solaris, and so on.
The transpiled code from w2c2 is available at celq-retro.
Initially, I tested the C output with a recent gcc version
installed on my system:
gcc -Os -std=gnu90 \
   -D_GNU_SOURCE -DHAS_UNISTD=1 -DHAS_TIMESPEC=1 \
    -DHAS_SYSUIO=1 -I./vendor \
    main.c celq.c vendor/wasi.c -o celq -lm
Not only did it compile, but the smoke tests passed with the transpiled version. That was promising. My next move was to find a C89 compiler that could target Windows 98.
My recommendation for anyone attempting the same for a CLI is: DJGPP. I learned that there is a port of GCC that targets DOS. andrewwutw/build-djgpp had releases from 2023 that ran on modern Linux environments, which was quite handy. I compiled the code with:
i586-pc-msdosdjgpp-gcc \
    -o celq.exe \
    -O2 \
    -I./vendor \
    -DHAS_UNISTD=1 \
    -DHAS_TIMESPEC=0 \
    main.c celq.c vendor/wasi.c
It generated a 5 MB binary. The binary would have been too big to fit on a floppy disk, but I suppose it could be distributed via CDs. I am aware that it is not a native Win32 binary and that it runs on a DOS extender. Nevertheless, for my CLI it worked flawlessly.
OpenWATCOM and supporting many Windows versions
There is a missing part of the previous section that I did not tell you: DJGPP was not the first compiler I tried. It was the second one. The first one I tried was OpenWATCOM.
OpenWATCOM is the successor of the WATCOM C/C++ compiler, based on the source code that was made available in the early 2000s. Originally, the compiler was proprietary. Among its many claims to fame, WATCOM was used to compile DOOM for the game’s original release. With such a reputation, I had to try OpenWATCOM.
To my surprise, the modern version of OpenWATCOM runs on 64-bit operating systems. There is even a GitHub Action to set it up, called setup-watcom. I am amazed at how easy it was setting things up. I swear cross-compiling for Windows 98 was easier than cross-compiling for modern macOS.
There was one major problem, however. w2c2’s
wasi/win32.h header contains a conflicting definition
of dirent with Watcom’s vendored dirent.h. I
ultimately gave up on solving the conflict and simply stubbed the
problematic functions with #ifdef __WATCOMC__ statements. I
think the conflicts are fixable and could be upstreamed to w2c2. But
given that DJGPP worked right away, I was not motivated to pursue
that.
With the stubbed functions in place (throwing an error), I compiled the binary with:
wcl386 -l=nt -os -i=./vendor \
   -d__inline__= \
   -d_WIN32 \
   -d_X86_ \
   -d_MSC_VER=1000 \
   -dHAS_UNISTD=0 \
   -dHAS_TIMESPEC=1 \
   -bm \
   main.c celq.c vendor/wasi.c vendor/win32.c -fe=celq.exe
OpenWATCOM took longer to compile than DJGPP and produced a bigger binary (8 MB). Nonetheless, it was a true Win32 binary. I tested it on Windows 98; it worked. I tested it on Windows XP; it worked as well. I tested it on Wine; it also worked. I tested it on Windows 11; it still worked.
It is a shame that I had to stub the WASI functions, because that blocked access to the file system. The binary produced by OpenWATCOM had the quality of running on Windows versions spanning three decades. That was remarkable.
Time traveling
In the earlier sections, I was fortunate enough to find recent compilers targeting vintage systems. I wanted to also test the time travel route: get my hands on a contemporary C89 compiler for the target system and compile from there.
For Windows 98, this is generally the time when you would summon Borland C++ 5.02 or Visual C++ 6.0. Together with WATCOM, I believe those were the most accurate tools for the period.
For this blog, I decided not to go the abandonware route and stuck with open-source software: MinGW was my compiler of choice. For personal use, I think abandonware is fine, but sharing it is more of a grey area. The advantage of MinGW is that I can easily share the setup.
My first task was to get my hands on the oldest MinGW version I could find. Ideally, I wanted it to be compiled to avoid having to build the toolchain. To my surprise, https://archive.debian.org/ still hosts the original MinGW binary uploads. Thanks, Debian.
I built two Docker images:
ghcr.io/celq-playground/celq-retro/debian-etch-mingw with
MinGW 3.4.5 from the Debian 4.0 release; and
ghcr.io/celq-playground/celq-retro/debian-woody-mingw with
MinGW 2.95 from the Debian 3.0 release. The compiler is available
through the i586-mingw32msvc-gcc command.
There are older versions of MinGW, but I settled for the very first version uploaded to Debian. I could not find anything earlier than 2.95 on SourceForge either. Some early versions of Dev C++ might have bundled even earlier editions of MinGW, though.
build-oldest-mingw.yml has the workflow and incantation that makes compilation work. I can attest that it produces valid binaries: the executable passes the smoke tests on Windows 11.
I tested celq.exe on Windows 98 and, unfortunately, it
crashed at runtime. celq.exe --version and
celq.exe --help did work, but anything doing computations
failed. On a more positive note, the binary worked on Windows ME and
Windows XP, so I was still happy with the result.
Actually Portable Executable
Last but not least, Actually Portable Executables (APEs). I had always thought about chaining Cosmopolitan with w2c2, so this was my chance to do it.
For those unfamiliar with Cosmopolitan, it is a tool that makes C/C++
run anywhere. cosmocc can create “fat” polyglot binaries
that run on Linux, macOS, Windows, FreeBSD, NetBSD, and OpenBSD. It
feels like magic, to be honest.
I replaced gcc with cosmocc from the
command in the earlier sections and things just worked. The binary from
cosmocc was the largest at 9.5 MB, which is almost twice
the size of platform-specific binaries.
I can attest that the strategy works: the binary did run on Linux, macOS, Windows, and FreeBSD. For some reason, the smoke tests failed on Windows, but I am still in awe it ran on four OSes and passed on three of them.
So I will put it out there: if you want to make a polyglot Rust CLI,
wasm32-wasip1 + w2c2 + cosmocc works.
Topics not covered
Rust9x
I want to highlight Rust9x by Dennis Duda. This is another sensible way of targeting Windows 95 and Windows 98. There is a Rust toolchain targeting Windows versions as early as Windows 95. I did not test Rust9x, but it was my backup plan if w2c2 failed.
Signing binaries
I did not sign my binaries. The reason was mostly centered on cost: generally you need to pay for code signing. If you are a legitimate open-source project, check out the SignPath foundation because that was one possible route. SignPath provides free code signing for reputable projects.
Anti-virus misclassifications
I did not run into this problem with celq, but there is a non-zero chance Rust binaries get classified as viruses by accident. This affects some libraries more than others; see Tauri, for example. While browsing Chocolatey, I noticed that even ripgrep sometimes got classified as malware. I wish I had more actionable advice.
wasm3
For the APE section, I believe wasm3 can achieve a similar effect. The idea is to compile a WASM interpreter with Cosmopolitan and then ship the interpreter plus the WASM file. The same applies for retro-computing, but wasm3 targets C99 which is more recent than C89.